New Olympus M.Zuiko 7-14mm F2.8 PRO Underwater
Jul 31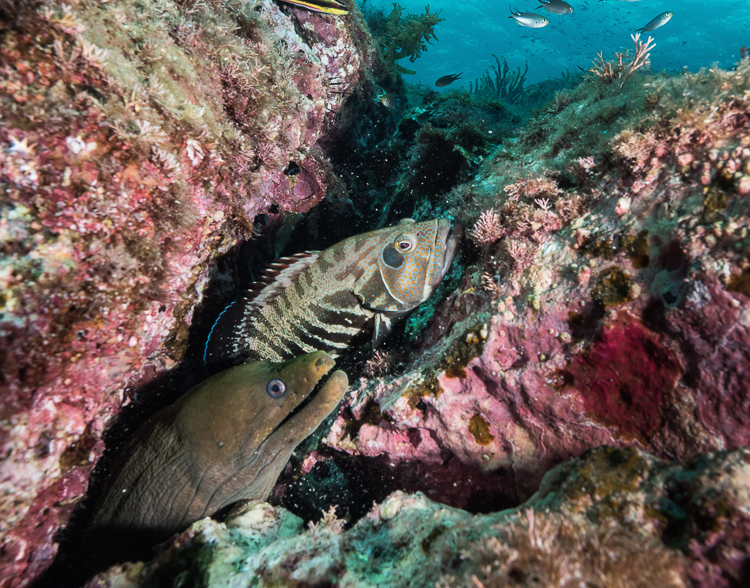
In addition to the new Olympus 8mm Fisheye PRO lens, Olympus has also released a fabulous new rectilinear wide angle lens, the Olympus M.Zuiko 7-14mm F2.8 PRO. This new PRO version completes the lineup of PRO lenses that also include the 12-40mm PRO and 40-150mm PRO giving photographers a full range of PRO focal lengths. Underwater we are most interested in wide angle or macro, and the 7-14mm works great when you don’t want to use a fisheye.
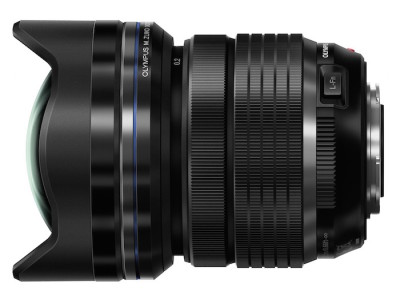
It gives users the ability to zoom making it easy to adjust composition a bit when you just can’t get as close to your subject as you would like. With 110º angle of view the Olympus Pro lens offers an edge over the popular Olympus 9-18mm lens, but the improved optics and weather sealing really make this lens stand out. Its direct competitor is the Panasonic 7-14mm which many underwater photographers having been using when they want something a little wider than the 9-18mm.
Let’s look at the differences:
Panasonic Lumix G 7-14mm F4
- $898
- 110º Angle of View
- F4 – decent speed
- Minimum focus – 9.84″
- Weight – .66 lbs
- Length – 3.27″
Olympus M.Zuiko 7-14mm F.28 PRO
- $1,299
- 110º Angle of View
- F2.8 – fast!
- Minimum focus – 7.87″
- Weight – 1.18 lbs
- Length – 4.17″
The new Olympus PRO lenses are definitely larger than other micro four thirds lenses, which is mostly due to the fast speeds they offer. The 7-14mm Pro lens feels much more professional than the Panasonic with an aluminum alloy body and splash proofing. In addition the new Olympus Pro lenses are the first micro four thirds lenses to have actual focus markings on the lens. Olympus has created a unique focus control system on their PRO lenses. Sliding the focus ring down changes the lens to manual focus and shows the focus scale on the lens. This position disables autofocus, so be sure when taking the lens underwater you have this ring in the proper autofocus position. For those wanting access to both auto focus and manual focus don’t fret – you can still set the camera to auto focus and turn the focus ring for manual focus as with any other micro four thirds lens. So we get the best of both worlds in the new 7-14mm PRO.
After shooting with the Olympus 7-14mm PRO for a week in the Sea of Cortez on the new OM-D E-M5 Mark II I was very pleased with the overall quality, focus speed and detail that this lens produces. I own the Panasonic 7-14mm and have always loved the wide angle of view it provides, but on my Olympus OM-D E-M5 camera there would sometimes be weird abberations with a purple glare (corrected in newer Olympus bodies). I also found that in my Zen glass port I would get lens reflections underwater, having to spend time in Lightroom removing the shadowy ghost of my lens make from the captured image. Using Nauticam’s glass dome over the week in the Sea of Cortez, both shallow and deep, I had no reflection issues on the new Olympus 7-14mm PRO. Compared to the 9-18mm this lens will feel much nicer, offers a wider field of view and much improved quality. I have also had problems with lens reflection in the 9-18mm underwater.
Sample Images:
- Chocolate Chip Sea Star in the Sea of Cortez
- Scorpionfish camoflauges among the rockey reef
- A school of baitfish swim up the rock wall
- A Gulf Greysby and Moray hang out together
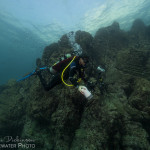
- Diver against a steep wall drop off
Would I recommend this lens? Most definitely. I loved the quality of images this lens produced, and the bright F2.8 aperature offers improvements for shooting ambient light, and for video recording. While it is more of an investment than other similar lenses, those looking for the best possible quality will love this lens.
The biggest drawback I found when using this underwater (with Nauticam housings) is that the N85 port size opening of all Nauticam Micro Four Thirds housings is too small for this new PRO lens. This means that you’ll be spending a bit more to house the Olympus 7-14mm Pro lens. You’ll need the Nauticam N85-N120 adapter and the best port option is the 7″ Glass Dome Port. In addition, installing the lens requires first putting the camera without the lens in the housing, then attaching the lens from the front. This is easy to do and doesn’t require much time, but can be a pain when you want to remove a memory card or change the camera battery as you will need to first remove the port and take off the lens before you can pull the camera out of the housing.




Related Articles
Popular Articles